
Troubleshoot Common Problems with Google Maps API Keys
Troubleshooting Common Problems
If your Dynamic Store Locator map isn’t displaying correctly and/or there’s an overlay on your map that says ‘For development purposes only’, here are three things to double-check.
Make sure your full account is activated on Google Cloud
Google Cloud starts everyone off with a free trial for 90 days, after which you need to go into their dashboard and enable your full account. There’s a good chance that your free trial with Google Cloud just ended and now you need to activate your full account in order to continue using their services.
- Go to cloud.google.com
- Login to the email account you used to create your Maps API Key (if you’re not already logged in)
- Click ‘Console’ in the upper right hand corner
- Once logged in, Google may prompt you with a popup to ‘Activate’ your account.
- Or, in the upper right hand corner of your Google Cloud dashboard, there will be a blue ‘Activate' button that you’ll need to press.
Enable billing in the Google Cloud project that houses your Maps API Key
You must add a credit card and set up a billing account in order to have a Maps API key. While you may have already set up your billing details and put a card on file for your Google Cloud account, you need to make sure that billing has also been enabled on the specific project that your Maps API Key was created in.
- Go to cloud.google.com
- Login to the email account you used to create your Maps API Key (if you’re not already logged in)
- Click ‘Console’ in the upper right hand corner
- On the Google Cloud Console homepage, under ‘Quick Access’, click the ‘Billing’ button.
If your project doesn’t have billing enabled, then you’ll see a message that “This project has no billing account”. Click ‘Link billing account’, then from the dropdown list, select your active billing account, and then “Set account”.
If your project does have billing enabled, then below the search bar, in the middle of the screen, click ‘Manage billing account’ and you should see the project name listed under “Projects linked to this billing account”.
For further troubleshooting of billing issues, see Google’s guide on “How to verify the billing status of your projects” or “How to enable, disable, or change billing for a project”.
If after troubleshooting the above problems, your map still isn’t populating correctly, then please submit a ticket with our support team by going to the Dynamic Store Locator app in Shopify > “Help Center” on the left column > Submit A Ticket.
Double Check Your Enabled APIs
All 5 of the below listed APIs must be enabled for the API key you are using for the store locator map.
- Click the hamburger menu in the upper left hand corner, hover over APIs & Services and click Enabled APIs & services.
- Then click on Maps JavaScript API.
- Scroll down and make sure all 4 of the following APIs are enabled:
- Maps JavaScript API
- Places API (New)
- Geocoding API
- Maps Embed API
- Click the blue-highlighted "Enable" button next to each of the above listed APIs. If there's a grey "Disable" button, then that means the API is already enabled and you don't need to do anything for that API.
Ensure Your Restrictions are Set Up Correctly
Google Cloud starts everyone off with a free trial for 90 days, after which you need to go into their dashboard and enable your full account. There’s a good chance that your free trial with Google Cloud just ended and now you need to activate your full account in order to continue using their services.
- Click on the hamburger menu (the three stacked lines) in the upper left hand corner. In the dropdown, hover over “APIs & Services” and then click “Credentials”.
- On the Credentials screen click on “Maps Platform API Key”.
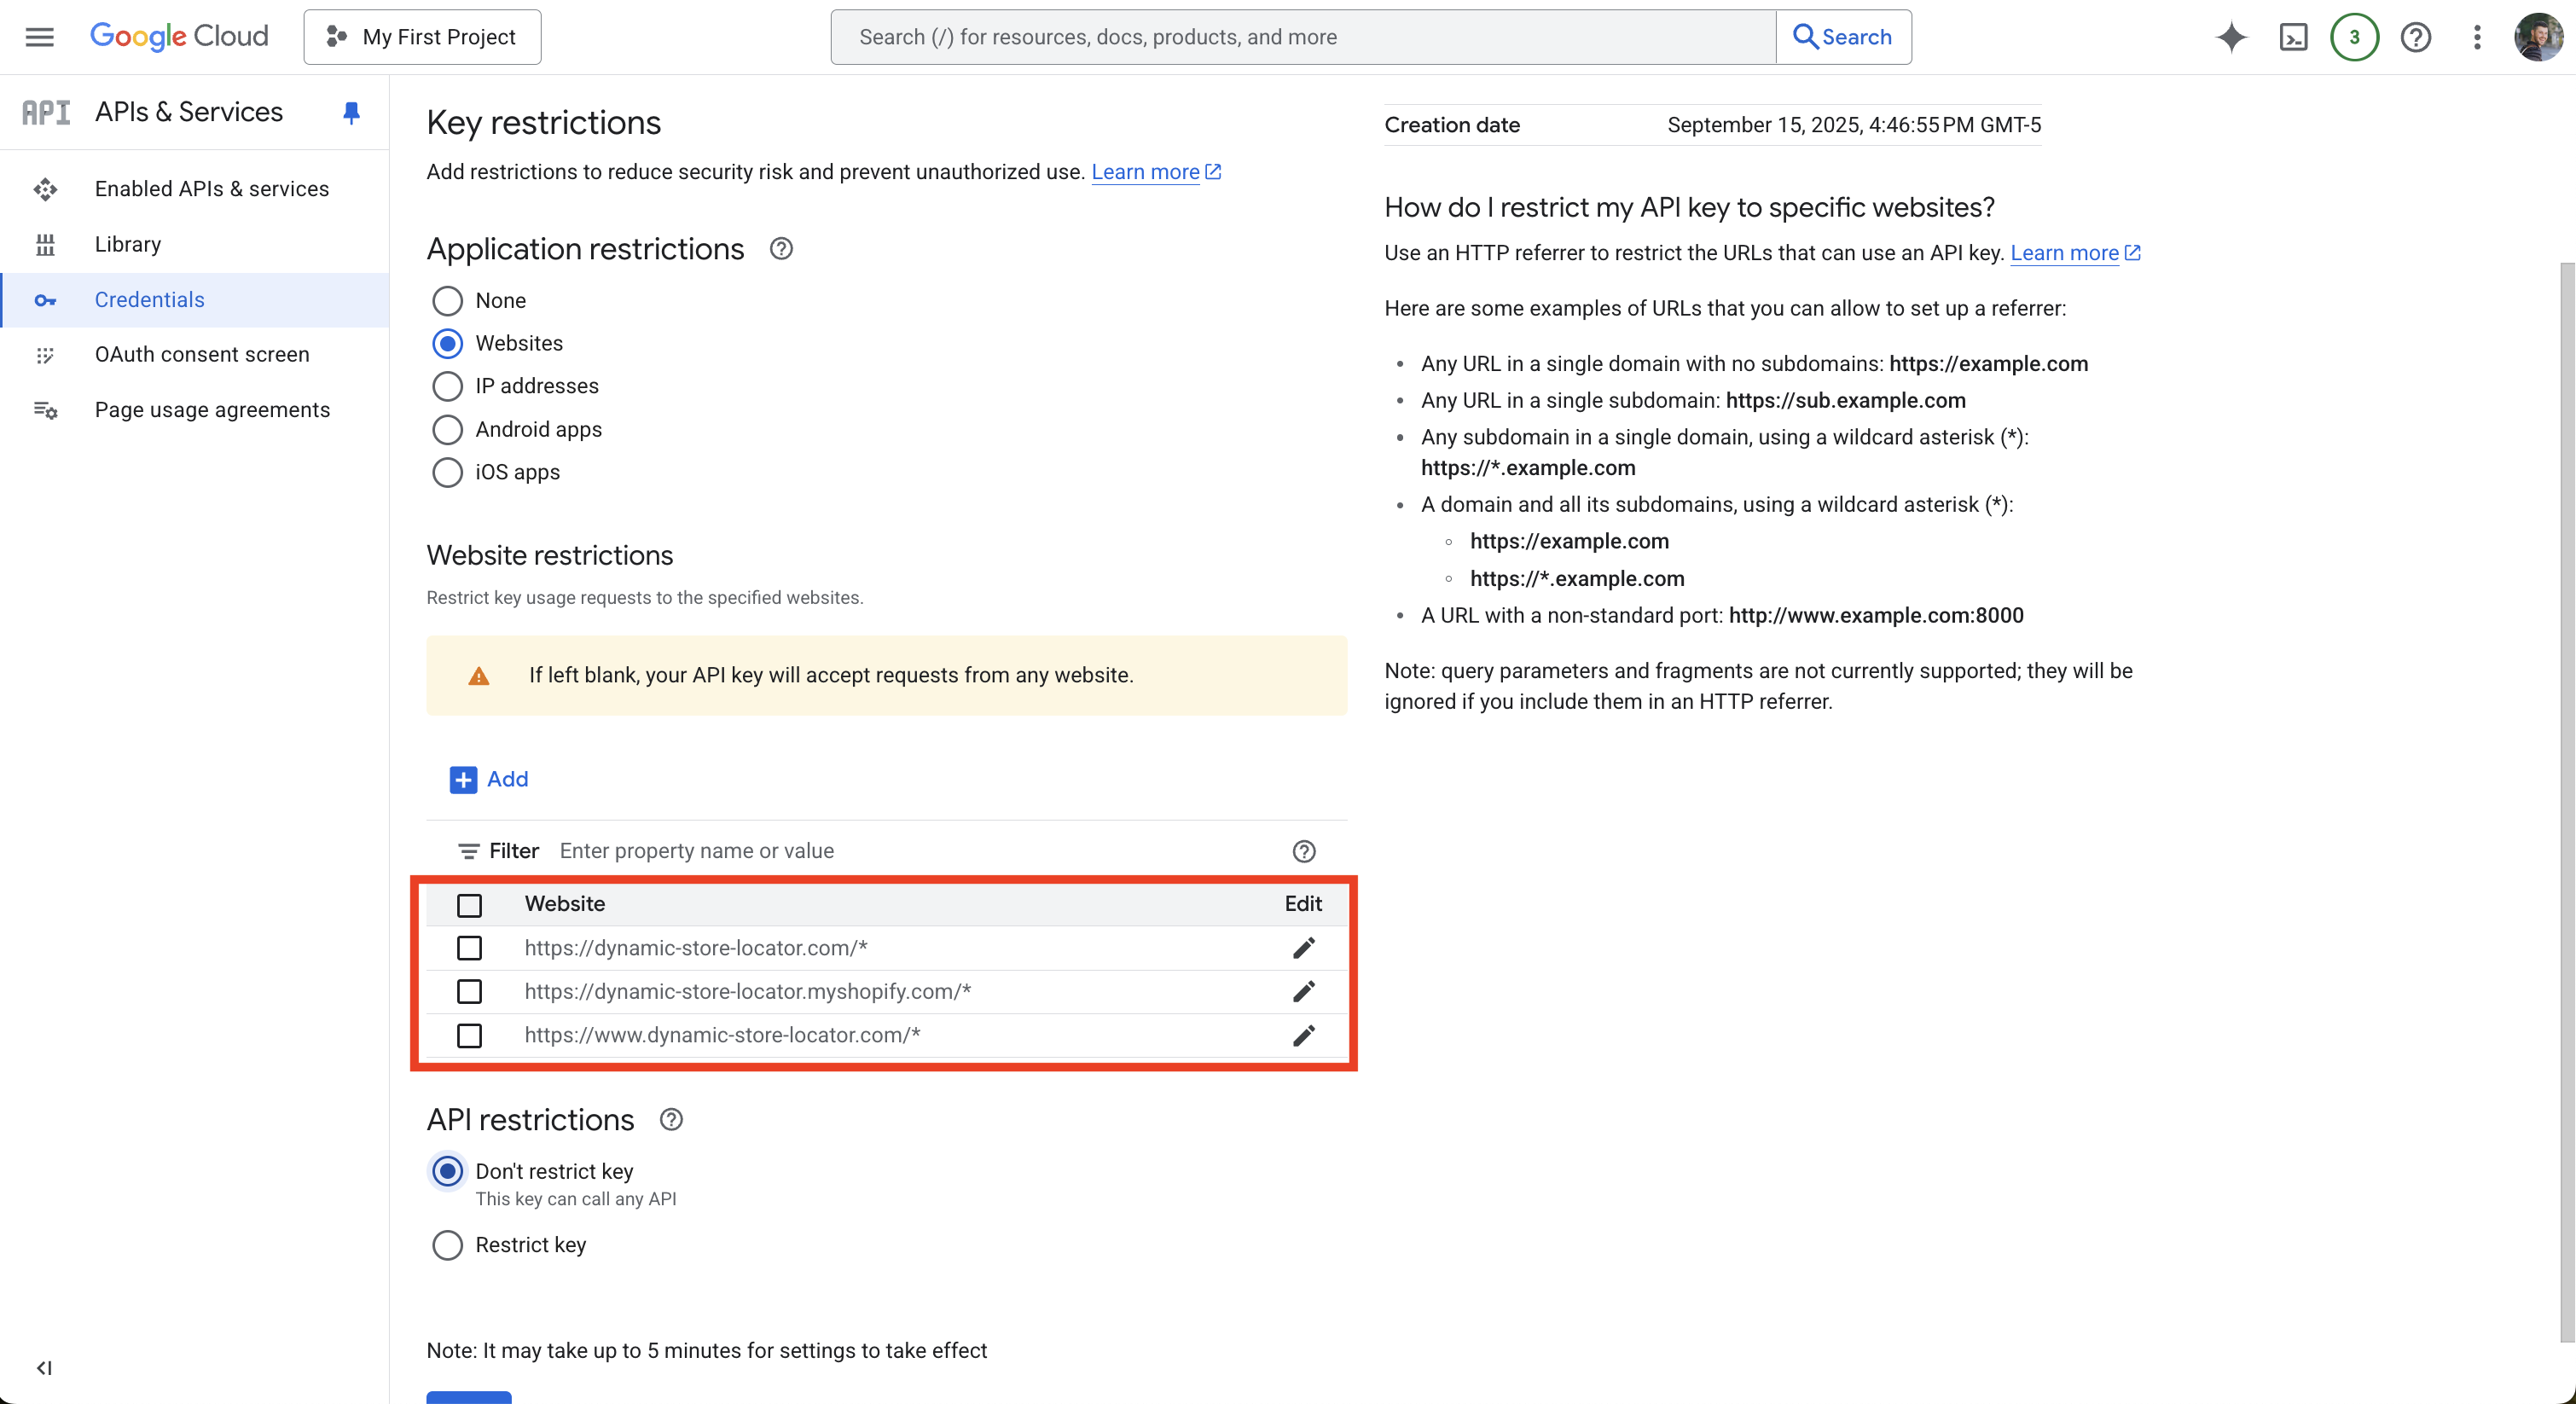
- Under “Application restrictions” your settings should exactly match the below except use your store's myshopify.com URL and primary URL. The asterisk at the end of the domain is extremely important as well as having both the root and www versions of your domain:
Advanced Maps API Key Troubleshooting
If your map isn’t displaying correctly and/or there’s an overlay on your map that says ‘For development purposes only’, here are the steps to identify the exact issue causing the problem.
- Open your website in in a Google Chrome browser (you must use Chrome for this)
- Navigate to the page of your site where your store locator map is embedded.
- Right click anywhere on the screen and click ‘Inspect’.
- In the Inspect tool, select ‘Console’ from the top menu.

- Scroll down until you see a Google Maps error message.

- Identify the specific error message for your map listed to the right of “JavaScript API error:”
- Go to Google’s list of Maps API error codes here, locate the corresponding error message, and take the necessary steps they outline to solve the issue.
We are happy to help!
We offer FREE white glove installation assistance to all customers. Schedule an installation meeting here.